How to validate email with JavaScript: Tutorial and sample code
 John Kelesidis

The most simple type of email validation involves checking that an email address follows the correct structure: a user name followed by an @ symbol, a domain name, and a top-level domain.
You can use a regex to check that the syntax of data input into your form matches that of a real email address and then allow addresses that pass this test onto your list.
This article will show you how to validate an email address with Javascript code. We’ll also highlight some of the benefits and limitations of Javascript email validation and show you when it may be preferable to use an alternative method.
What is email validation?
Email validation is the process of verifying that an email address is real. Basic validation checks that the address is formatted correctly, while more comprehensive tests confirm that the address exists and can receive incoming mail.
The exact factors that the validation process looks for can vary. Here are some of the most common things that you can check:
Address syntax: Verifies that the input data matches the format of an email address
Domain: Confirms the email’s domain exists and checks whether it is a catch-all domain
Mailbox status: Checks if the specific email address exists on the mail server and accepts mail
Role-based address check: Identifies addresses linked to roles like admin or support
Disposable emails: Checks if the email address domain name belongs to a known disposable email provider
This process typically happens in real-time on forms with an email input box. You can also validate a list of email addresses in bulk at any time.
Why is email validation important?
Email validation is important because it tells you if an email address is real. This has several benefits.
Improve the customer experience: Inputting the wrong email address will stop customers from receiving communication like offers, signup confirmations, and 2FA emails. Email validation makes this less likely by checking that the email they use is real.
Maximize the number of leads: If a lead inputs the wrong email address, you won’t be able to contact them. This is less likely to happen if you check the email addresses people input in your forms.
Stop bots joining your list: Sometimes bots will spam your signup form with fake email addresses. Having real-time validation on your forms makes this less likely to happen.
Protect email deliverability: Sending to fake email addresses will cause your messages to bounce which can impact deliverability. By only letting real email addresses onto your list, you’ll stop this from happening.
How to validate an email address in JavaScript
Using Javascript for email validation is beneficial because it’s a widely used language that is compatible with most platforms you are likely to use. Javascript also requires minimal resources, keeping the signup process fast and minimizing potential barriers.
When validating an email with JavaScript, it’s important to understand the format and structure of an email address so that you can define the criteria for validation. An email address contains 2 sections made up of ASCII characters and separated by an @ symbol.
The first section (before the @) contains the identifying (or personal) information of the email address. For example a name, role, or department. This can contain the following characters:
Uppercase and lowercase letters (A-Z)
Numbers (0-9)
A period or full stop (.) as long as it’s not the first or last character or following another period or full stop
Other special characters: ! # $ % ^ & * _ + = ? - ` { } | ~
The second section (after the @) contains the domain name that the email address belongs to. For example gmail.com, mailercheck.com, or apple.com. This contains:
Letters (A-Z)
Numbers (0-9)
A period or full stop (.)
Hyphens (-)
To validate an email address in JavaScript, the most popular method is to use regular expressions (or regex) to check its structure and format.
What is a regular expression (regex)
A regular expression (regex) is a sequence of characters that defines a search pattern. It’s relevant to email validation because it allows you to identify when data that is input into a form matches the format that is expected for an email address.
If the format matches the regex you use to identify email addresses, then you can mark the address as valid. If it doesn’t, you can mark it as invalid.
How to check email format with JavaScript regex
Here are the steps for validating an email with JavaScript. You can find the code for the regex function below.
1. Define the criteria for validation and create a regular expression using a regex pattern that matches common email formats. The regex should account for all valid characters, an @ symbol, and a domain with a top-level domain (TLD).
2. Create a validation function that inputs an email address and uses the regex to check it against the criteria you defined.
3. Test an email address by using the validation function to check if it matches the regex pattern.
4. Handle the validation result by providing feedback (e.g. showing an error message on a signup form) or taking another action (e.g. adding the email address to your suppressions list).
Now let’s take a look at an example of a JavaScript regex pattern and function for validating an email.
JavaScript Regex Function for Email Validation
1. First we need to create a regex pattern that matches basic, common email formats. Here's an example:
^[^\s@]+@[^\s@]+\.[^\s@]+$
Regex breakdown:
^: Defines the start of the string
[^\s@]+: Matches one or more characters that are not whitespace or @ both before and after the @ character and in the TLD
@: Matches the @ character
\.: Matches the . (period/full stop) character required before the TLD
$: Defines the end of the string
2. Then we’ll create a function to validate the email. The function should use the regex pattern to check the email string.
function validateEmail(email) {
const emailPattern = /^[^\s@]+@[^\s@]+\.[^\s@]+$/;
return emailPattern.test(email);
}
// Usage example
const email1 = "[email protected]";
const email2 = "invalid-email";
console.log(validateEmail(email1)); // true
console.log(validateEmail(email2)); // false
Function breakdown:
function validateEmail(email) {
Defines a function named “validateEmail” which takes the “email” parameter
const emailPattern = /^[^\s@]+@[^\s@]+\.[^\s@]+$/;
Defines a regex pattern which should be used to validate email addresses
return emailPattern.test(email);
}
The function uses the “test” method of the regex object to check the submitted email address against the pattern
Example of a more complex regular expression
In some cases, you might want to use a more complex regex pattern to more closely comply with the RFC 5322 standard. Here’s an example of a more complex regex pattern you could use:
/^[a-zA-Z0-9._%+-]+@[a-zA-Z0-9.-]+\.[a-zA-Z]{2,}$/;
Regex breakdown:
^[a-zA-Z0-9._%+-]+: Matches the section of the email before the @ symbol. It allows for letters (A-Z), numbers (0-9), periods/full stops (.), underscores (_), hyphens (-), plus signs (+), and percent signs (%)
@[a-zA-Z0-9.-]+: Matches the second section (domain) of the email after the @ symbol. It allows for letters (A-Z), numbers (0-9), periods/full stops (.), and hyphens (-)
\.[a-zA-Z]{2,}$: Matches the TLD section of the email and requires at least 2 letters
How to create an HTML email signup form with JavaScript validation
So now we know how to create the regex pattern and JavaScript function, let’s apply it to an email signup form.
<!DOCTYPE html>
<html lang="en">
<head>
<meta charset="UTF-8">
<meta name="viewport" content="width=device-width, initial-scale=1.0">
<title>Email Signup Form</title>
<style>
.error {
color: red;
}
</style>
</head>
<body>
<h2>Email Signup Form</h2>
<form id="signupForm">
<label for="email">Email:</label>
<input type="email" id="email" name="email" required>
<button type="submit">Sign Up</button>
<p id="error-message" class="error"></p>
</form>
<script>
function validateEmail(email) {
const emailPattern = /^[^\s@]+@[^\s@]+\.[^\s@]+$/;
return emailPattern.test(email);
}
document.getElementById('signupForm').addEventListener('submit', function(event) {
event.preventDefault(); // Prevent the form from submitting
const emailInput = document.getElementById('email');
const errorMessage = document.getElementById('error-message');
if (validateEmail(emailInput.value)) {
errorMessage.textContent = ''; // Clear any previous error message
alert('Email is valid! Form submitted.');
// You can add your form submission logic here
} else {
errorMessage.textContent = 'Please enter a valid email address.';
}
});
</script>
</body>
</html>
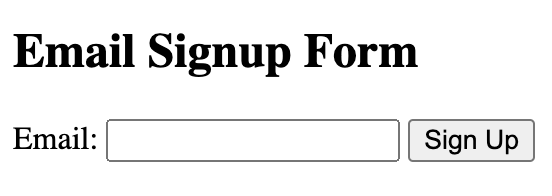
This code snippet provides us with the basic HTML structure for a form with an input field for email addresses and a submit button. We’ve also got an empty paragraph with the id "error-message" where we can display our error message if an email is invalid.
We’ve then got our JavaScript function:
Our validateEmail function to check the email address
An event listener to handle the submit event when the button is clicked
event.preventDefault() to prevent default form submission behavior
emailInput.value which is validated with the validateEmail function
A success message for valid emails “Email is valid! Form submitted.”
An error message for invalid emails “Please enter a valid email address.”
This code would display this basic HTML form:
CSS Styles for Email Validation Form
The form we’ve created is pretty basic looking. We can make it more attractive and modern with some CSS:
<style>
body {
font-family: 'Helvetica Neue', Arial, sans-serif;
background-color: #f4f4f9;
display: flex;
justify-content: center;
align-items: center;
height: 100vh;
margin: 0;
}
h2 {
color: #333;
margin-bottom: 20px;
}
form {
background: #fff;
padding: 20px;
border-radius: 10px;
box-shadow: 0 4px 8px rgba(0, 0, 0, 0.1);
width: 100%;
max-width: 400px;
box-sizing: border-box;
}
label {
display: block;
margin-bottom: 8px;
font-weight: bold;
color: #555;
}
input[type="email"] {
width: 100%;
padding: 10px;
margin-bottom: 20px;
border: 1px solid #ccc;
border-radius: 5px;
box-sizing: border-box;
font-size: 16px;
}
button {
width: 100%;
padding: 10px;
background-color: #007BFF;
border: none;
border-radius: 5px;
color: white;
font-size: 16px;
cursor: pointer;
}
button:hover {
background-color: #0056b3;
}
.error {
color: red;
margin-top: -15px;
margin-bottom: 15px;
font-size: 14px;
}
</style>
This code sets the styling of our form to use a more modern, easy-to-read sans-serif font. It also sets the background color and uses a flexbox to center the form.
We’ve also added some subtle shadows, rounded corners, padding and margins, as well as button styling. Finally, we’ve tweaked the style of our error message to include more spacing. Here’s what our new form with the added CSS looks like:
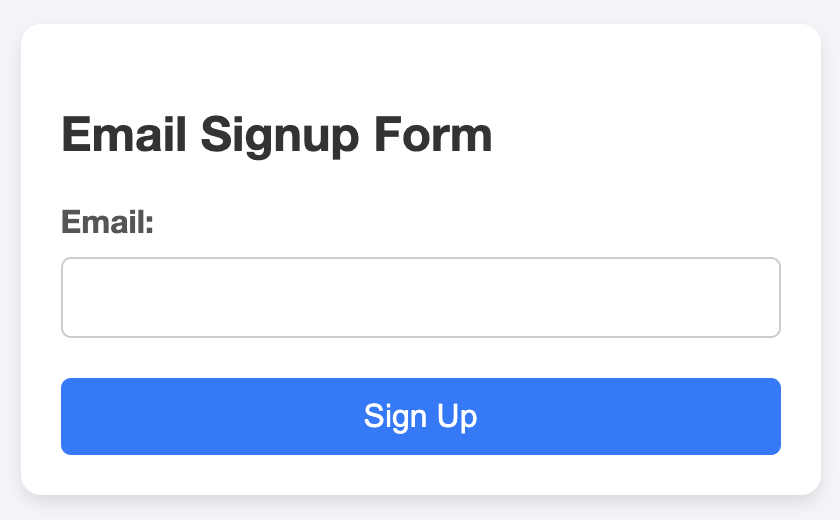
Much better!
Limitations of Javascript email validation
The problem with Javascript email validation is that while using a regex is a relatively easy way to check the syntax of an email address, this is only one sign that an email address is low quality.
People and bots can pass syntax checks with low-quality addresses that have the same format as a real address, such as those that belong to full mailboxes, role-based emails, or addresses with typos.
This opens your signup forms up to abuse from bots and spammers, and makes it possible that people will join your list with the wrong email address.
For a more complete validation, you’ll have to perform SMTP checks and DNS lookups. While possible with Javascript, the process is more complicated than simple syntax checks as you have to connect to the external services that can perform these tests.
Javascript Email Validation vs MailerCheck validation
Another option is to perform a more comprehensive check that is still fast and easy to implement with a tool like MailerCheck. Rather than using Javascript, connect to our API to easily add email validation to your signup forms.
As well as syntax errors, MailerCheck validates the address by looking for other errors, including:
Full mailboxes: Inboxes that no longer receive mail, usually because they are no longer in use
Mailboxes that don’t exist: Mailboxes that either no longer exist or never did
Disposable email addresses: Temporary email addresses that people use to avoid spam
Typos: When the address contains a typo. This may be due to an error by the person inputting the information
Catch-all domains: When the domain will accept the email but it’s not guaranteed that the address belongs to a person
Role-based emails: Addresses that belong to a group of people or a department
Blocked mailboxes: When the service provider blocks the address due to poor sending practices
This more comprehensive check better protects your signup forms from abuse and mistakes, reducing the chances that low-quality email addresses will make it onto your list.
What’s more, getting set up is a breeze thanks to our simple API and comprehensive documentation. Read on to see how it works.
How to use MailerCheck’s API to validate emails
Using JavaScript alone will only allow you to validate that the structure of an email address is valid. It won’t allow you to check whether an email address is real and deliverable. For that, you can use MailerCheck’s email validation API.
When an email is submitted, it is sent to a NodeJS backend and from there, to MailerCheck where it is verified as a real email address or as invalid or risky.
As well as identifying syntax errors, MailerCheck can also tell you whether an email address has typos, is catch-all, role-based, disposable, or whether the mailbox is blocked, doesn’t exist, or is full.
To get started with validating an email address using the MailerCheck API with JavaScript, you can follow these steps:
1. Sign up for a MailerCheck account. It’s completely free to sign up and you’ll get 200 free credits to try it out.
2. Create an API token by going to API tokens in the left navigation menu and clicking Generate token.
3. Set up your HTML form to collect emails and use JavaScript to submit them to your NodeJS backend and call the MailerCheck API.
Change the <script> element of your HTML page to the following:
< script >
document.getElementById('signupForm').addEventListener('submit', function(event) {
event.preventDefault(); // Prevent the form from submitting
const emailInput = document.getElementById('email');
const errorMessage = document.getElementById('error-message');
fetch('http://localhost/', {
method: 'POST',
headers: {
'Content-Type': 'application/json'
},
body: JSON.stringify({
email: emailInput.value
})
})
.then(response => response.json())
.then(result => {
console.log(result);
if (result.success) {
errorMessage.textContent = ''; // Clear any previous error message
alert('Email is valid! Form submitted.');
} else {
errorMessage.textContent = result.text || 'Please enter a valid email address.';
}
});
});
<
/script>
This submits the email into your NodeJS backend which we assume is hosted at 'http://localhost'.
On your backend, you need a simple NodeJS script to retrieve the form submission, send the email to MailerCheck, and return the results to your HTML form.
Here, we use the 'express' package to make handling the form submission easier. The script also assumes you’ve installed the dotenv package and created a file in the root directory of your project named .env and added your API token to it.
const express = require('express');
const cors = require('cors');
require('dotenv').config(); // Load environment variables from .env file
const app = express();
app.use(express.json());
app.use(cors());
app.post('/', function(request, response) {
let email = request.body.email;
fetch('https://app.mailercheck.com/api/check/single', {
method: 'POST',
headers: {
'Authorization': `Bearer ${process.env.MAILERCHECK_API_TOKEN}`, // Use environment variable for API token
'Content-Type': 'application/json'
},
body: JSON.stringify({
})
})
.then(response => response.json())
.then(data => {
if (data.status === 'valid') {
response.json({
success: true,
text: 'Email is valid.',
color: 'green',
});
} else {
response.json({
success: false,
text: 'Email is invalid.',
color: 'red',
});
}
})
.catch(error => {
console.error('Error:', error);
response.json({
success: false,
text: 'An error occurred during validation.',
color: 'red',
});
});
});
app.listen(80, () => {
console.log('Listening at port 80');
});
This part of the code uses the fetch API to make a POST request to the MailerCheck API endpoint for a single email verification.
fetch('https://app.mailercheck.com/api/check/single', {
method: 'POST',
headers: {
'Authorization': `Bearer ${process.env.MAILERCHECK_API_TOKEN}`, // Use environment variable for API token
'Content-Type': 'application/json'
},
body: JSON.stringify({ email })
})
To handle the API response, use this code to check the status of the MailerCheck response and pass the appropriate result to the HTML form to be displayed to the user.
.then(response => response.json())
.then(data => {
if (data.status === 'valid') {
response.json({
success: true,
text: 'Email is valid.',
color: 'green',
});
} else {
response.json({
success: false,
text: 'Email is invalid.',
color: 'red',
});
}
})
.catch(error => {
console.error('Error:', error);
response.json({
success: false,
text: 'An error occurred during validation.',
color: 'red',
});
});
If the status in the response is “valid”, it will update the result div with the success message (“Email is valid.”) and make it green. If not, the result div will be updated with an error message (“Email is invalid.”) in red.
Email list validation will help keep your list clean
Whether you choose JavaScript or integrate with MailerCheck, validating email addresses will help keep your list clean, protect your deliverability, and keep the emails you send out of the spam folder.
Use JavaScript if you need a simple and free way to stop form input that doesn’t match the format of an email onto your list. Or integrate with MailerCheck for a more comprehensive method of stopping low-quality addresses, role-based emails, catch-all domains, and more from joining your list.
Try MailerCheck free
Get full access to our API and validate emails in real time for as little as $0.001 per address. Hit the button below to see our pricing.